Arduino에서 XBee 를 사용하는 방법입니다. 책 Making Things Talk 의 203페이지에서는 XBee 칩의 초기화
및 주소 설정 과정이 있습니다만, 브로드케스팅방식을 사용하는데는 굳이 위의 주소설정 과정을 거치지 않아도 잘 동작 합니다.
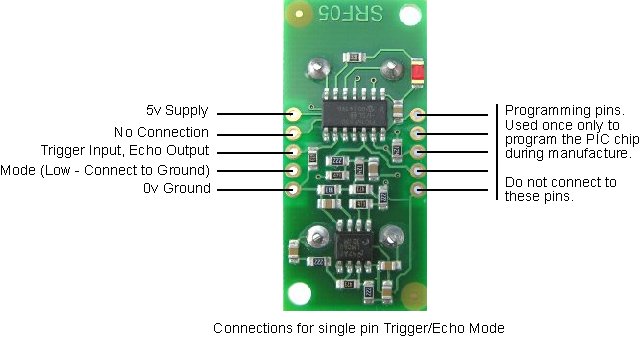
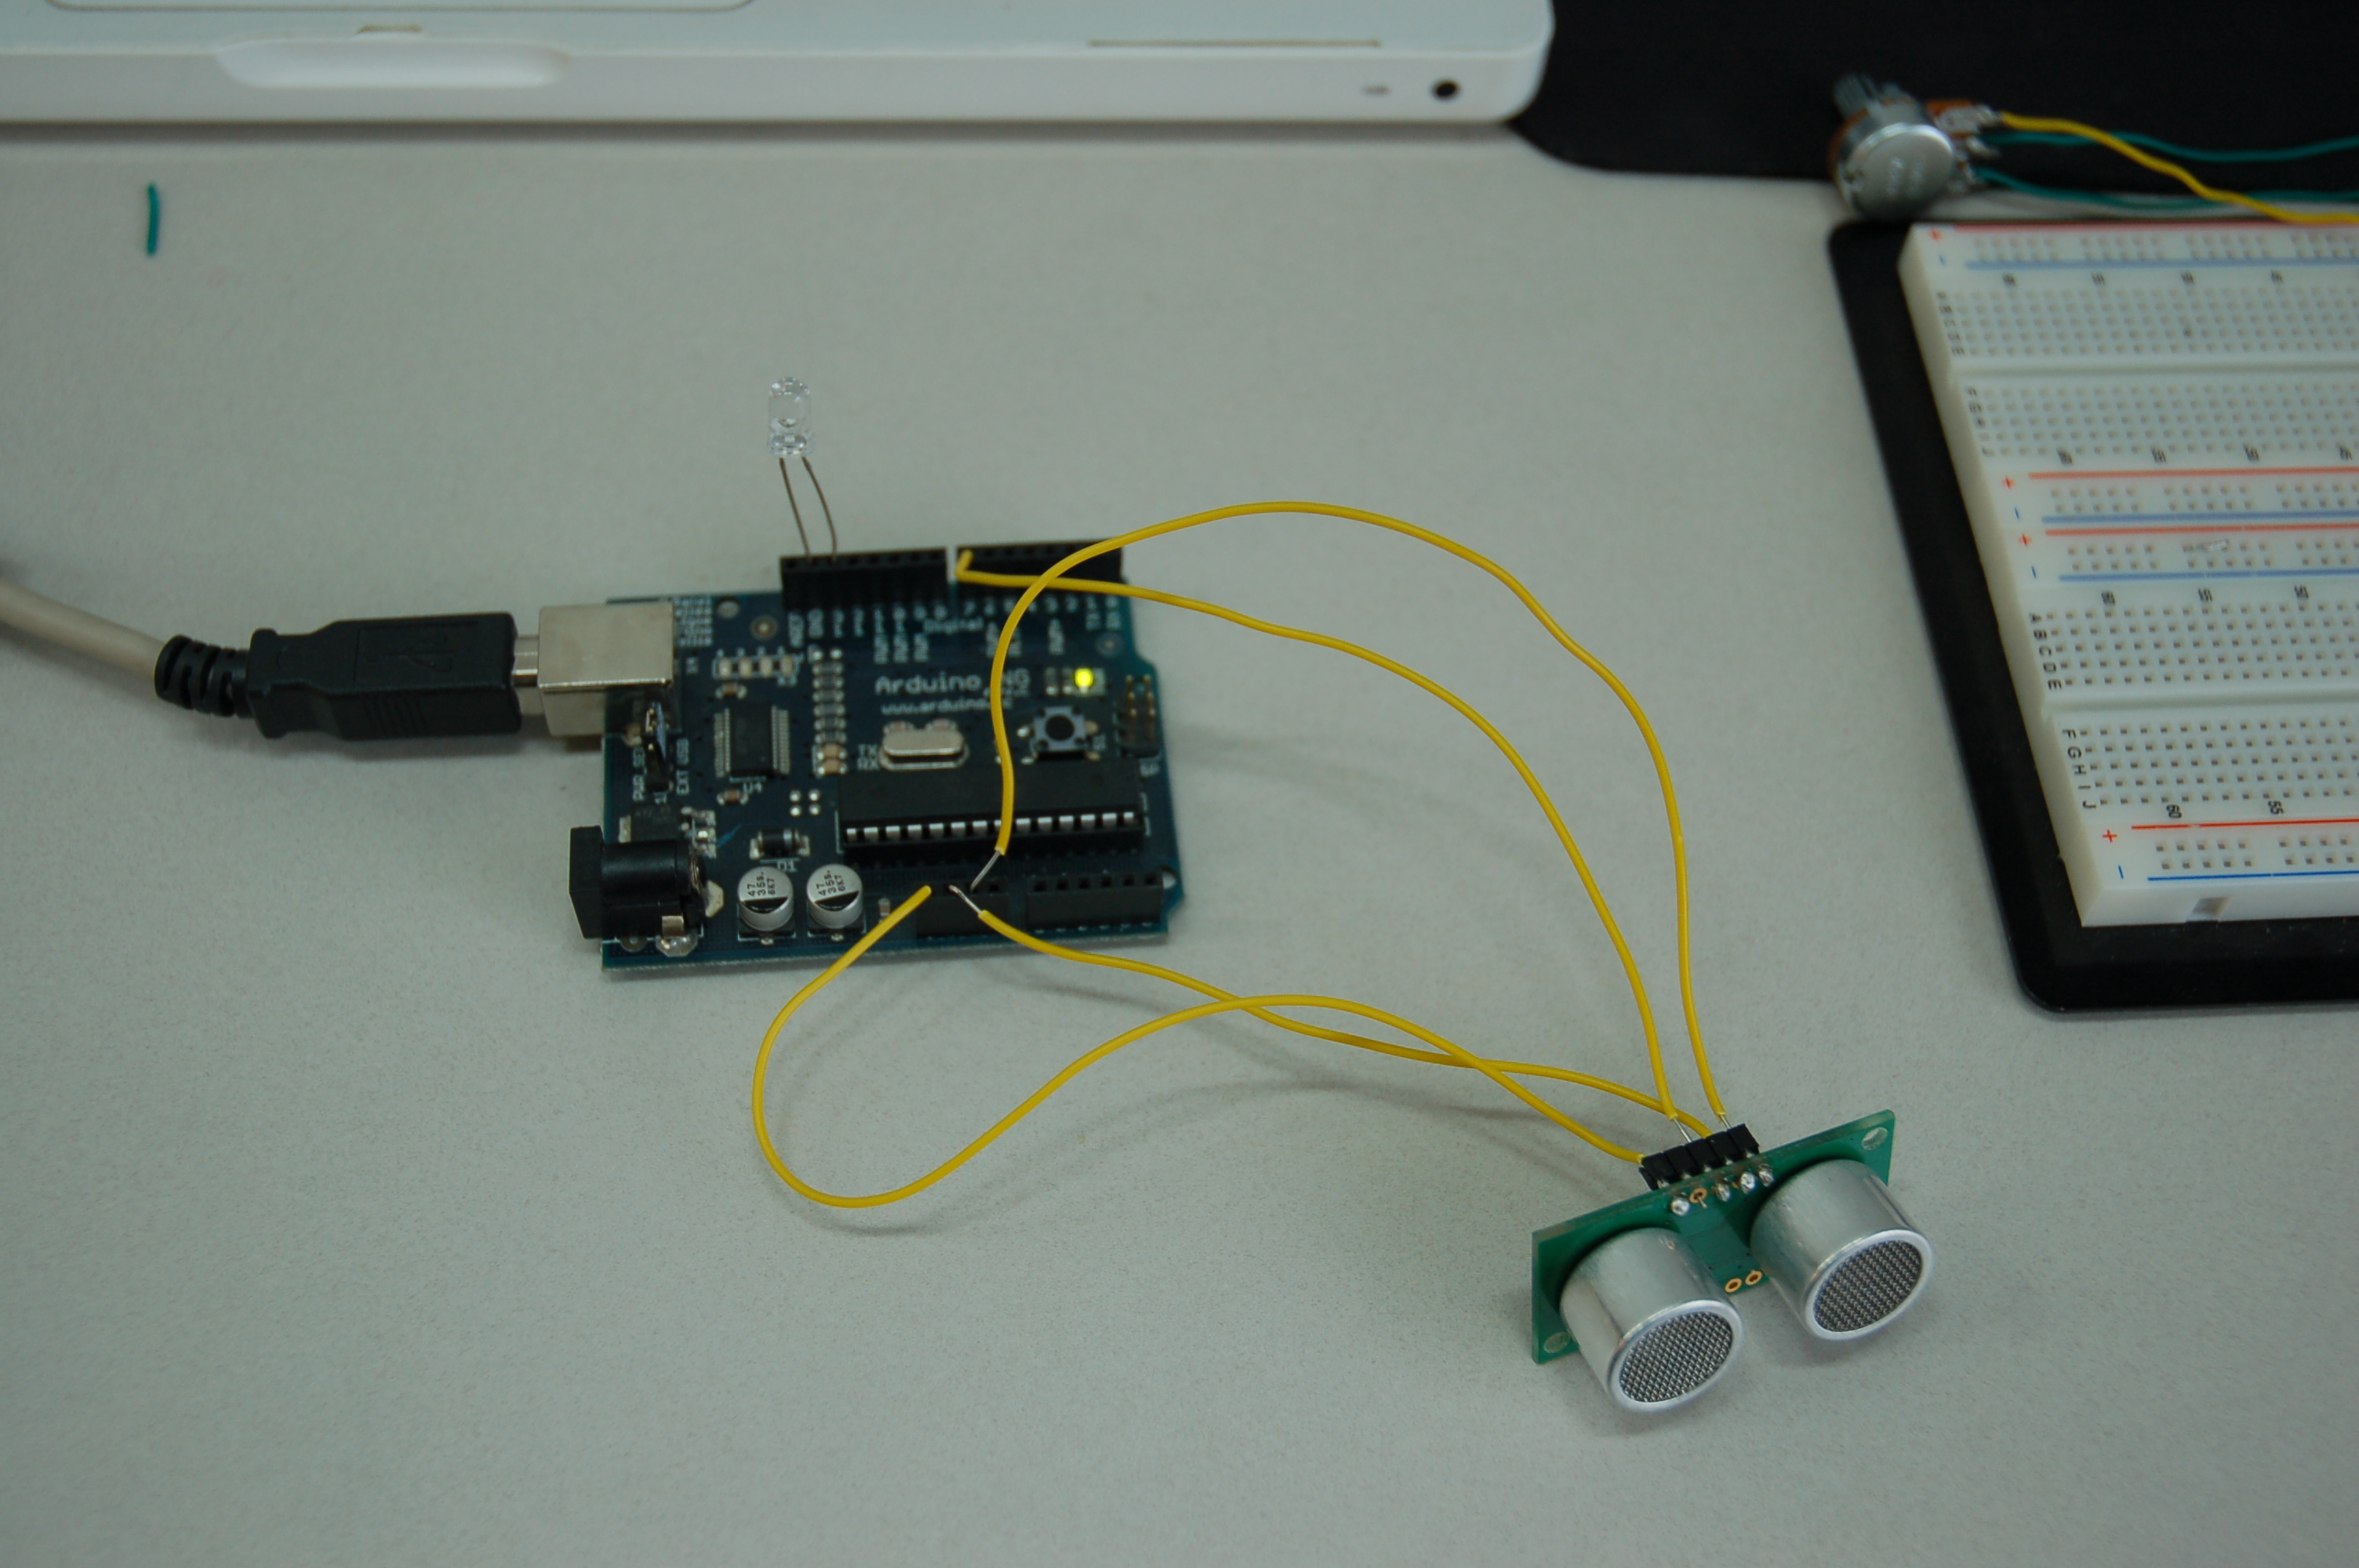
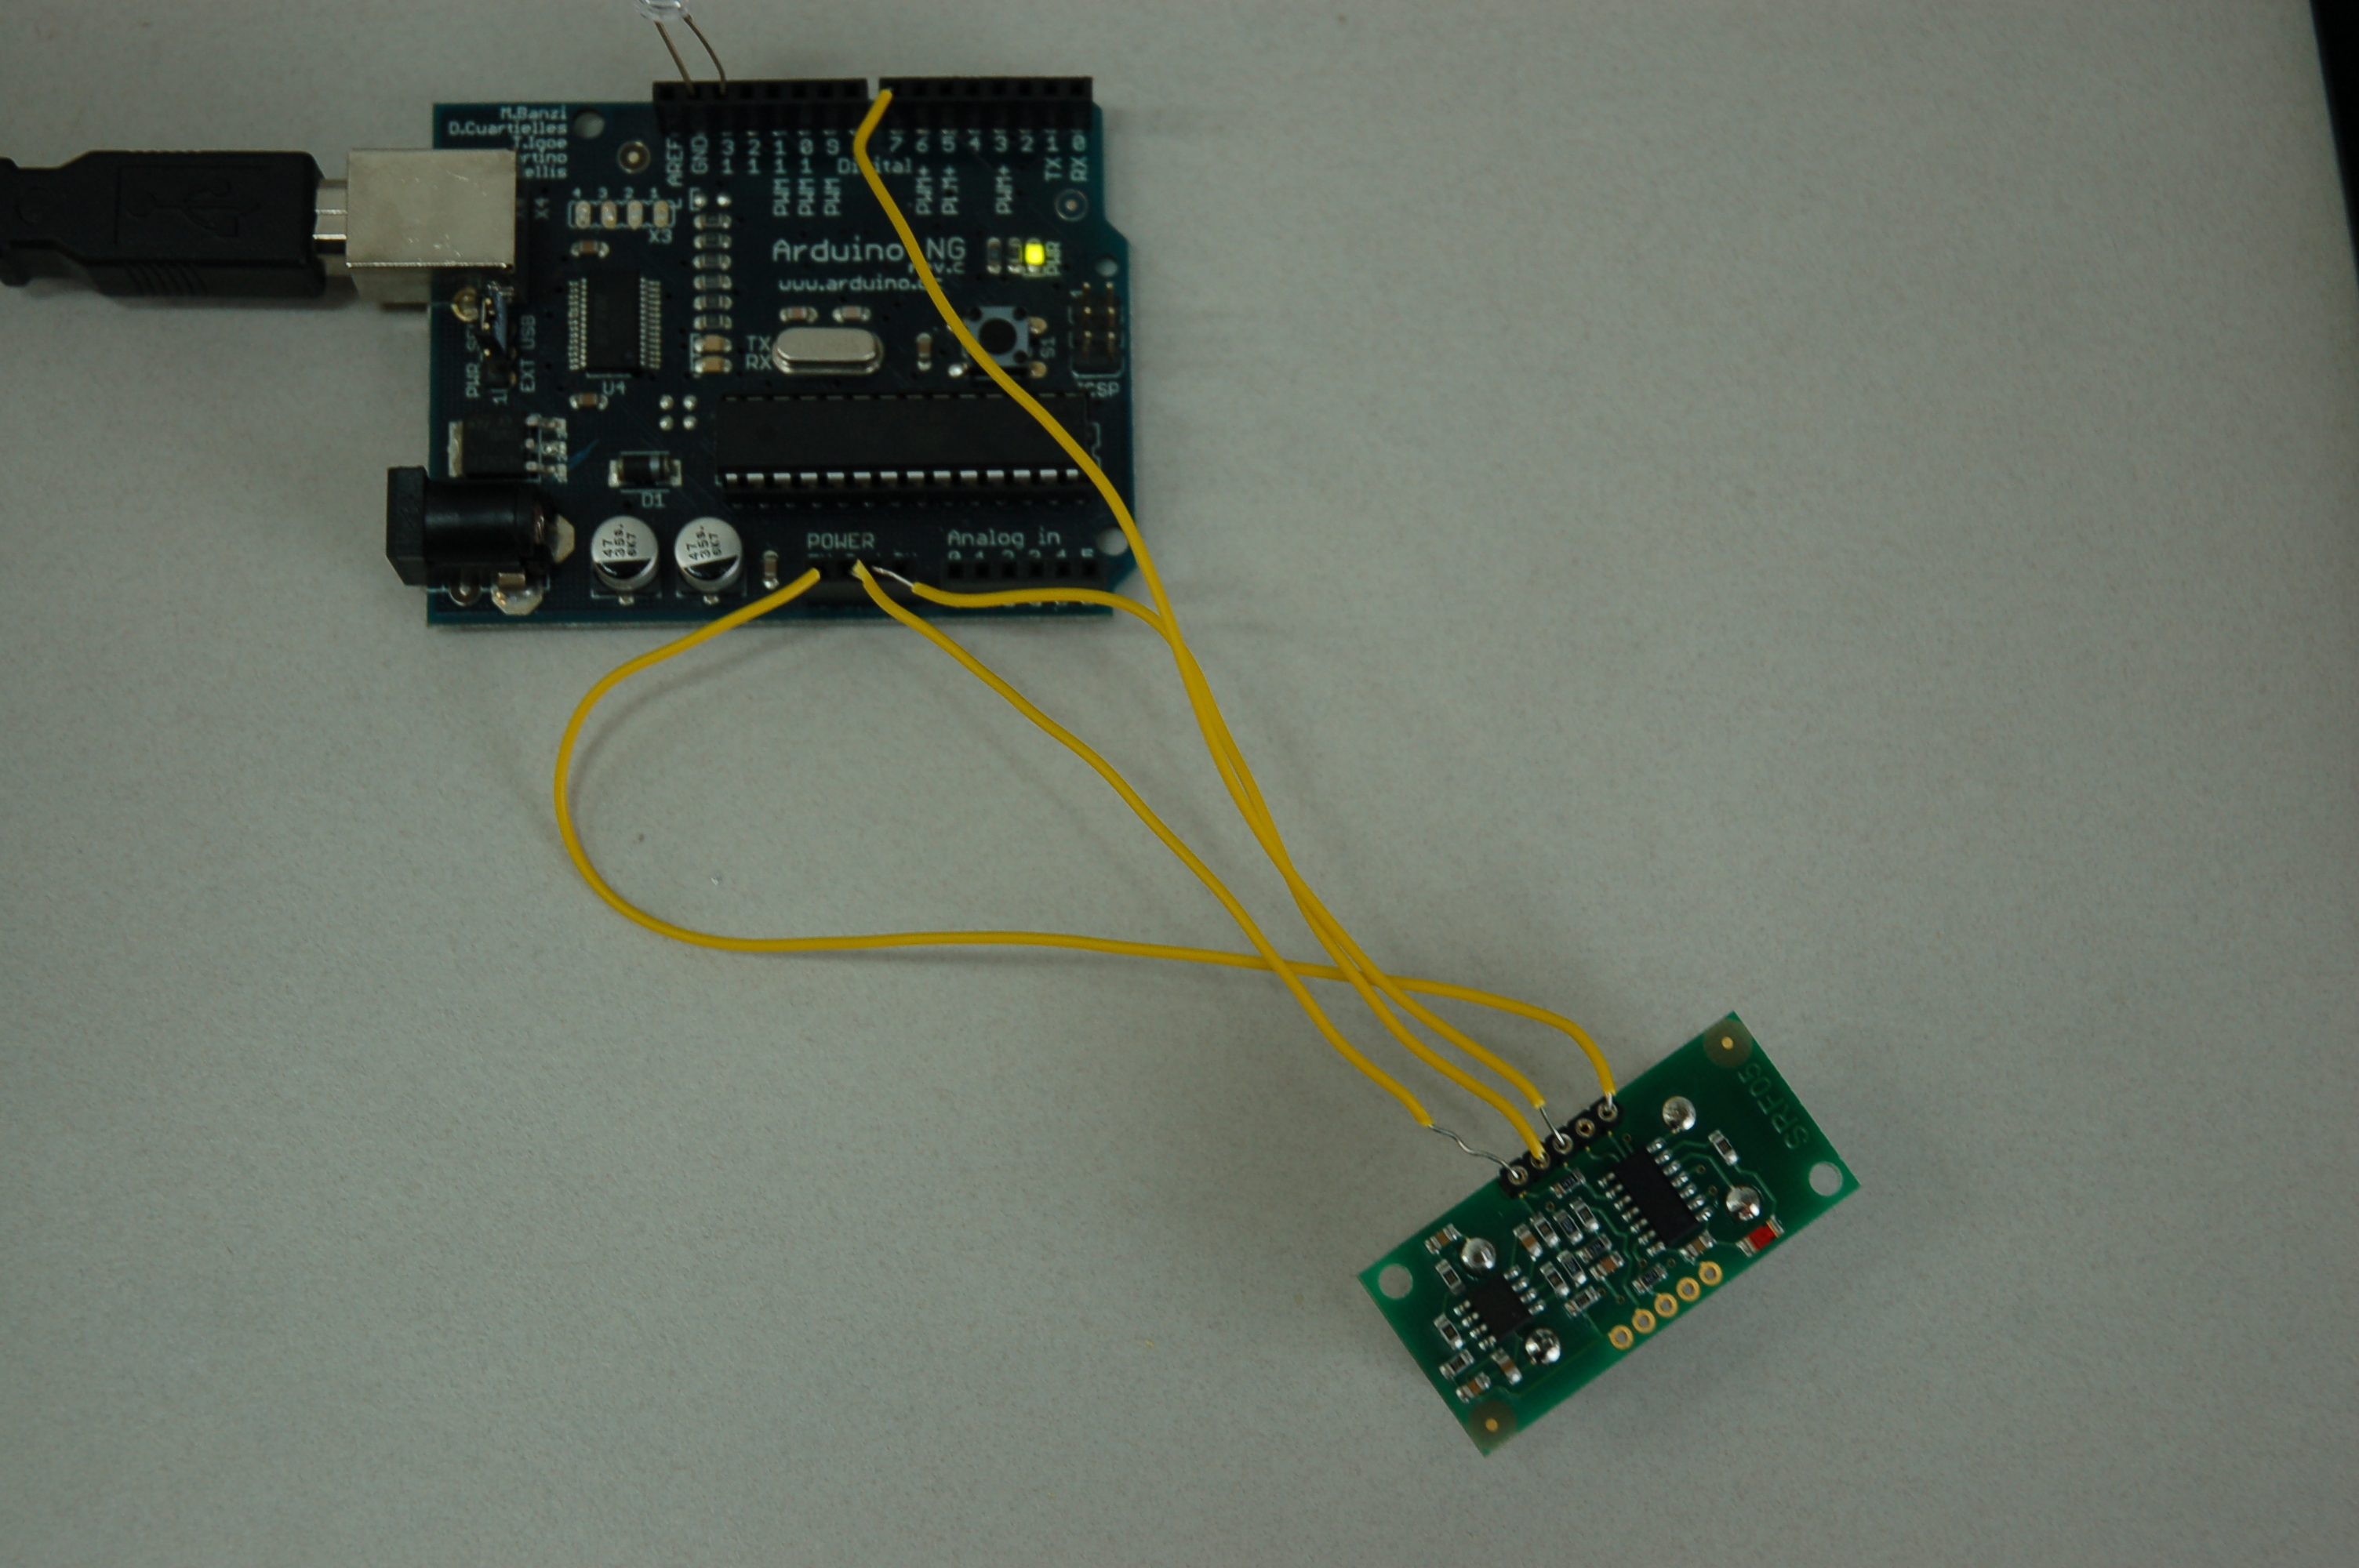
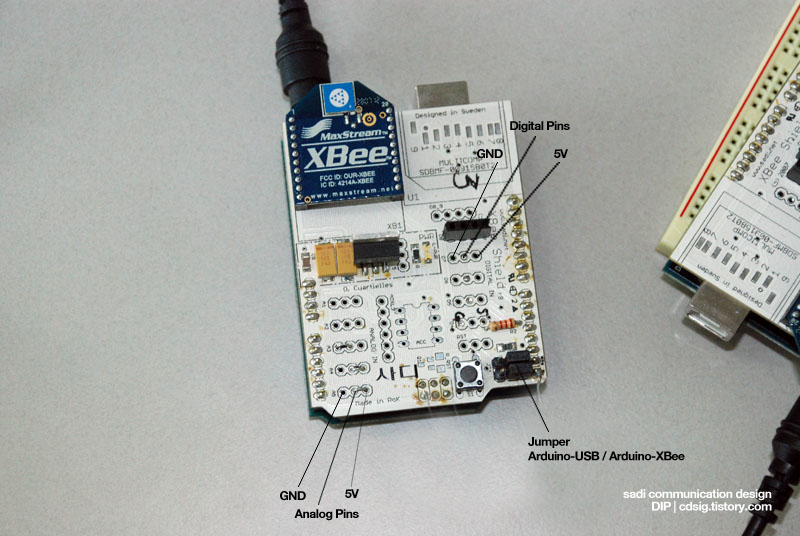
책에서는 XBee 의 좁은 핀을 넓혀주는 Breakout board를 사용하거나 Arduino 에 장착되기 쉽게 만든 XBee Shield를 사용합니다. 여기서는 sadi의 XBee Shield 를 사용하였으나, 굳이 Shield 가 없어도 구성 방법은 동일합니다. XBee의 핀에 소켓등을 꽂아 핀번호에 맞게 Power / Tx, Rx 등을 연결만 해주면 됩니다. (선들이 좀 주렁주렁 지저분 해지겠지만요)
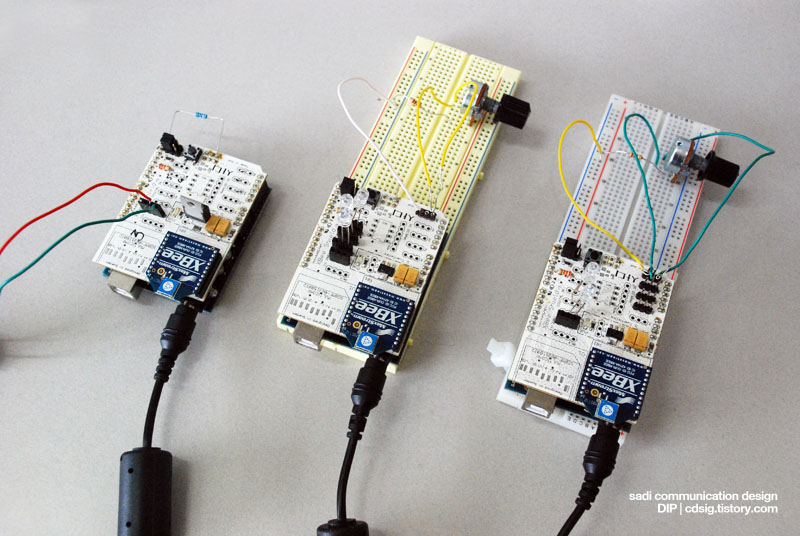
sadi XBee shield 를 사용할 경우 다음과 같이 Analog 와 Digital Pin 을 사용할 수 있습니다.
주의할점은, USB 를 통하여 컴퓨터와 통신 (Arduino 프로그램 작성 및 다운로드 등) 하는 경우는 우측하단의 점퍼 두개를 왼쪽두개로 잡아주어야 합니다. (XBee 와 통신시에는 오른쪽 두개)
XBee 간의 통신은 브로드캐스팅 방식으로, 별 특별한 코드 없이 일반적인 Serial.print() 와 Serial.read() 로 정보를 쏘고 수신할 수 있습니다. 다음과 같이 마스터/슬레이브 또는 서버/클라이언트 구분없이 동일 코드에서 송신/수신을 테스트 해 볼 수 있습니다.
통신 가능한 거리는 실내에서는 30미터가 안되는 것 같고 확 트인 야외에서는 100미터 정도 가능하다고 합니다.
및 주소 설정 과정이 있습니다만, 브로드케스팅방식을 사용하는데는 굳이 위의 주소설정 과정을 거치지 않아도 잘 동작 합니다.
책에서는 XBee 의 좁은 핀을 넓혀주는 Breakout board를 사용하거나 Arduino 에 장착되기 쉽게 만든 XBee Shield를 사용합니다. 여기서는 sadi의 XBee Shield 를 사용하였으나, 굳이 Shield 가 없어도 구성 방법은 동일합니다. XBee의 핀에 소켓등을 꽂아 핀번호에 맞게 Power / Tx, Rx 등을 연결만 해주면 됩니다. (선들이 좀 주렁주렁 지저분 해지겠지만요)
sadi XBee shield 를 사용할 경우 다음과 같이 Analog 와 Digital Pin 을 사용할 수 있습니다.
주의할점은, USB 를 통하여 컴퓨터와 통신 (Arduino 프로그램 작성 및 다운로드 등) 하는 경우는 우측하단의 점퍼 두개를 왼쪽두개로 잡아주어야 합니다. (XBee 와 통신시에는 오른쪽 두개)
XBee 간의 통신은 브로드캐스팅 방식으로, 별 특별한 코드 없이 일반적인 Serial.print() 와 Serial.read() 로 정보를 쏘고 수신할 수 있습니다. 다음과 같이 마스터/슬레이브 또는 서버/클라이언트 구분없이 동일 코드에서 송신/수신을 테스트 해 볼 수 있습니다.
void setup() {
Serial.begin(19200);
pinMode(txLed, OUTPUT);
pinMode(rxLed, OUTPUT);
}
void loop() {
if(Serial.available() > 0) { // Listening
digitalWrite(rxLed, HIGH);
handleSerial();
... 중간생략
char sensorValue = readSensor();
if(sensorValue > 0) {
digitalWrite(txLed, HIGH);
Serial.print(sensorValue, DEC);
Serial.print("\r");
digitalWrite(txLed, LOW);
}
}
void handleSerial() {
inByte = Serial.read();
if((inByte >= '0') && (inByte <= '9')) {
inString[stringPos] = inByte;
stringPos++;
}
if(inByte == '\r') {
int brightness = atoi(inString);
analogWrite(analogLed, brightness);
for(int c=0 ; c<stringPos ; c++) {
inString[c] = 0;
}
stringPos = 0;
}
}
통신 가능한 거리는 실내에서는 30미터가 안되는 것 같고 확 트인 야외에서는 100미터 정도 가능하다고 합니다.